 Expert eBooks Courses | Online-eBook-Download.com Latest digital books and courses, Tips & Tricks, How-to guides, free ebooks, software discounts, coupons & much MORE… Instant Download

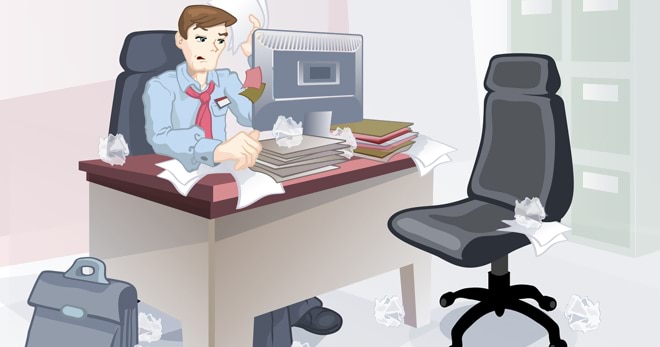
Your bedroom and office are the two areas where you spend the most time. Think of it this way: if you average eight hours of work and eight hours of sleep every day, that means almost two-thirds of your life is spent in these two spaces. This makes it just as important to declutter your office as it is to declutter the rest of your home.
Your office is your place of business. And since you are cleaning a professional area, why not treat it in a professional manner? This area should only contain items that relate to your business and create a productive mindset. We’ll show you how to do this.
Getting Started with Your Office
The size of this decluttering task can vary depending on whether you have a large home office or a small cubicle at work.
Your first job is to determine the difficulty of the task and make a plan. Start by asking a few questions:
- What do you desire from your office?
- What does it currently lack?
- What can you (immediately) remove from the room?
- What problems do you foresee with making changes in the office?
- What do you need to do (every day) to maintain a decluttered space?
- What aspect of office organization matters most to you?
Don’t do this in your head. Write down the answers. This gives you time to think over what you really want from this space. You’ll use these responses to create an action plan for tackling your office.
Then you can get started.
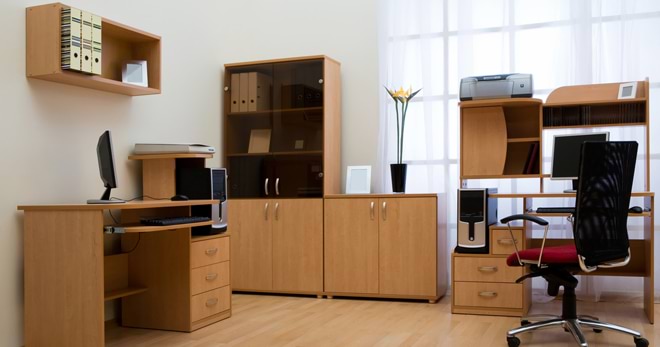
Divide Your Workspace into Zones
Typically, an office has many individual “zones.” (This is often true even when working in a compressed cubicle.)
- An area for work with a computer, keyboard, mouse and/or tablet
- A library for research, even if it is simply a few important books and/or manuals
- A storage area for supplies
- An area for incoming and outgoing paperwork
- A filing area for paperwork archives
The object here is to declutter on an area-by-area basis. Like each section of your home, you’ll organize one complete area before moving on to the next one.
1) Office Desk
This section is for tackling the space that’s used the most – your office desk.

It is a simple 10 minute task to do this. Get a box and put everything currently on your desk into the box, except for the mouse, keyboard and computer.
Now with everything off your desk, use your cleaning supplies to give the entire area a good scrub down. Once it’s clean and empty, begin the rest of the process of decluttering your office.
Office Desk Tips
- Your desk should contain what you use on a daily basis. Generally speaking, this means only computer equipment, pen, paper and your calendar. Everything else will be stored in the organized sections that we’ll discuss throughout this article.
- One way to ensure you have a decluttered desk is to sit in your chair and extend your arms. The spaces within your “wingspan” should contain only the items used on a daily basis.
Everything else should be organized or filed away. - You can keep personal items on your desk (like photos or a sentimental item), but try not to overload the area with random knick-knacks.
- Notes for meetings clutter your space, so be sure to create a daily process where you make decisions on what to do with this paperwork (we’ll talk more about this in a bit).
- Move your printer and/or scanner off your desk. These are bulky items that aren’t typically used on a daily basis. Put them under your desk or in another location in your office.
2) Electronics
Monitors, keyboards and other electronics can quickly become grungy looking. Since you’re decluttering your office, why not take time to clean these as well? This is another perfect 10 minute task because it only takes a short bit of time to go through all your items.
Use compressed air to spray any dust, crumbs and debris out of your keyboard. Then wipe down all flat surfaces (except for screens) on the keyboard, desktop, phone and printer with a lint-free rag.
To do a thorough job, take a Q-tip and clean all the cracks between the keys. You’ll probably need a few Q-tips because a lot of stuff can get in there.
For your computer screens, you’ll probably need a special LCD/LED cleaning solution that won’t damage the screen or leave streaks. You can get this in a spray or sometimes as little pre-moistened towelettes.
Electronic Tips:
- Consider using twist-ties and labels for all your wires. Not only will this make them look more presentable, it will also help you identify where each item connects.
- Cleaning electronics is an ongoing project, so be sure to set aside a few minutes each week to clean the electronics in your office.
3) Desk Drawers
All the junk that’s cleared off your desktop will need to go somewhere. That usually means the items will end up in your desk drawer. The trick is to avoid the common mistake most people make: taking everything and dumping it into a single drawer. All this does is create a disorganized mess that has a negative impact on your productivity.
You can organize desk drawers by grouping items together.
That said, you shouldn’t be obsessive about finding a container for everything. The important thing is to focus on the items you use most often. Pens need to be next to pens, paperclips next to paperclips and so forth.
There are many ways to be creative when organizing similar items. There are many organizational products made specifically for desks. You can try plastic inserts, or you can use a nice wooden drawer.
For every desk drawer, consider doing four separate tasks (if you’re dealing with a lot of items):
- Spend the first 10 minutes emptying the drawer, placing everything into a box (or in the case of small items like paperclips, setting them aside to be grouped later), and then thoroughly cleaning the inside of the drawer.
- Make (or buy) inserts to segregate all items within the drawer.
- Put back the office supplies you use on a regular basis (like pens, pencils, paperclips, tape and scissors). Keep anything you’re not sure about in the box.
- After 30 days, if anything is still in the box, then consider these items to be junk. Give them away or throw them out. If something isn’t used in the span of a month, then you really don’t need it.
Desk Drawer Tips:
- You can get creative with drawers by crafting cardboard inserts. (Here’s a Pinterest photo that shows what this looks like.) We’ve seen tuna cans, egg cartons, mason jars and all sorts of “repurposed” items that have been used for desk drawer organization.
- Be sure to put any loose change into a coin drawer. You can save up this money and go to a Coinstar machine to redeem it for a gift certificate.
- Take time to tightly cap any liquid items (like Wite-Out).
- Test any batteries to make sure they’re still functional. If not, put them in a recycling box.
4) Active Paperwork
Paperwork is the lifeblood of most businesses, so the area where the paperwork flows in and out is the heart of the office.

The problem is that paperwork accounts for the largest amount of clutter in any office. It often crowds your desktop, table, shelves, drawers, file cabinet and even the floor. That’s why it’s not surprising that many people have trouble finding the right documents in an expedient manner.
For some, the solution is to go paperless, but even that can be a challenge because you need a system for scanning and filing these digital files.
The best solution for many people is to create a daily system for their documents. Not only will this organize your existing paperwork, it will help you process paper as it comes in.
The obvious first step is to tackle your inbox and outbox. Most people have trays for incoming and outgoing mail. Unfortunately, it’s not easy to use these items effectively. In this section, we’ll map out a process for creating a paperwork system that works.
Organizing Your Paperwork
Before we get into the “how-to” process, it’s important to understand the distinct lifecycle of paperwork:
- Paperwork comes into the office. It’s delivered by your boss, co-worker or the postal service. It also comes in the form of printed email, documents handed out during meetings and printouts from websites.
- Paperwork is sorted according to what needs to be done. Things that require work go in one pile. Bills go in another. Tasks to be completed are placed in another and “archived” items go in the final pile.
- Paperwork is processed. Whatever “action” is needed is accomplished.
- Paper is stored, destroyed or sent elsewhere.
These four steps form the basics of how paperwork is usually handled. The key to managing your documents is to take action based on the type of paperwork and where it is in the lifecycle.
First off, your physical inbox should only contain pieces of paper that don’t have specific actions assigned to them. At the end of every workday, this inbox should be emptied. This doesn’t mean the work has been completed, but you’ve at least given the paper a new “home.”
Next, you should file these items in multiple folders (preferably multicolored) based on the action that’s needed. Simply break them down according to the following:
- Read and sign
- Bills
- Write back (correspondence)
- Call
- Read (informational only)
- Action needed
- Task oriented (If you have major projects, I would recommend a folder for each.)
Processing paperwork can become a major obstacle to creating an efficient inbox system. Many people leave papers in their inboxes (or scattered around tables) as they deal with the different tasks.
However, if you file papers in separate folders, you can quickly organize paper according to what needs to be done.
Streamlining your work based on actions makes things more efficient. Rather than constantly shifting gears as you work, focus on similar tasks in bulk before moving on to the next action that needs attention.
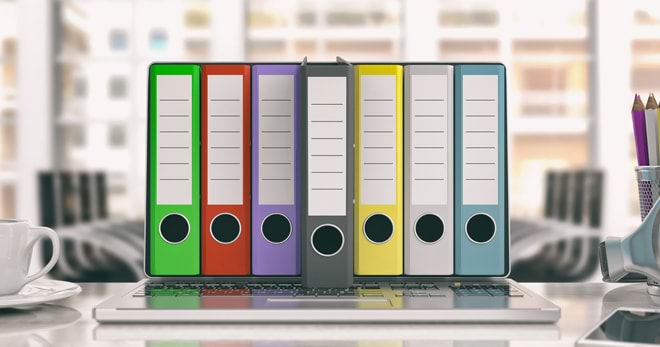
Next, there should be an area in your office for a filing cabinet, flip folders or file boxes. The amount of space you need varies by how much paperwork you handle on a daily basis. With more of the world going paperless, this filing system could be kept to a single cabinet or drawer.
This system can be organized in any way that makes sense to you. The important thing is to have a consistent process so you can quickly store paperwork and get it off your desk.
You shouldn’t keep every single piece of paper that you come across. Most papers can be destroyed or thrown away. Anything with personal information should be shredded. We recommend keeping a shredder under your desk so you can destroy unimportant items as you sort and process.
Paperwork Tips:
- Create a good filing system for all paperwork. This means having a separate folder for each of the following: finances, insurance, taxes, utilities, warranties, school documents and health records. You can even narrow down each of these categories based on the number of documents you receive on a regular basis.
- Invest in a filing cabinet, plus hanging file dividers and manila folders. This will display all your files in an organized way so you can quickly retrieve any item.
Another option is to use a wall organizer for these items or a partitioned box for all active paperwork. - Maintain small storage boxes for each year. For instance, you probably know it’s important to keep tax records for the past seven years. By having a box for each year, you can toss out paperwork from the oldest box, rewrite the label and then include documents from the past year.
5) Scan Your Paperwork (Optional)
Depending on how long you’ve stored paperwork, you may have a massive number of documents or perhaps very little.
There is really nothing “wrong” with having a lot of paper (if you can immediately find specific documents). The only downside is you’ll need multiple filing cabinets that can take up a lot of space.
Our question to you is:
“How much paper do you really need?”
Odds are, you probably keep more than you need.
Use a high-speed scanner (like the NeatDesk or the CamScanner mobile app) to quickly decrease the amount of paper clutter.
If you have a multi-folder filing system, the best way to handle this may be working on a single folder at a time. This task is perfect for one 10 minute decluttering session – work on one folder during one session. If some of your folders are pretty thin, you might be able to work through a few at a time.
Scanning Tips
- Be ruthless with your documents. Even with a high-speed scanner, the project will take a long time if you try to digitize each document. We recommend you eliminate needless items first and then scan everything else.
- Keep only the most important paperwork – like items stored for legal or tax purposes.
Everything else can be scanned and saved to a program like Evernote. With this program, you can add tags and descriptions to make finding information far easier than you could if it was stored in a physical folder. - Sign up for online statements. Most companies now offer digital versions of their paperwork (like bank statements, utility bills and credit card statements). Sign up and save yourself the hassle of having to digitize these documents.
- Use a service like Catalog Choice to get rid of junk mail. The fewer items you receive, the more time you’ll have to focus on important documents.
- Once you’ve minimized the amount of mail you receive, you can use a service like Earth Class Mail to digitize the rest.
6) Cables and Cords
Technology is great, but it can also cause a lot of clutter – especially when you’re buried under cables and cords. Not only can they be unsightly, they also can be unsafe. The simplest solution is to take a few 10 minute blocks to organize all the cords in your office.
Zip ties are your best friend. A few well-placed zip ties can secure your cables, eliminating trip hazards and reducing the likelihood that your cables will end up in a tangled mess.
Next, label all cables. A little circular tab is easy to place on a cord. Since nearly all electronics cords disconnect at both ends, this will help you find the “correct” cord regardless of how many times you move things around.
Finally, organize unused cords into cubbies where they won’t get tangled with other cables.
Cord Tip:
Use old toilet paper rolls to store cables. (Here’s a photo of how this looks.)
7) Digital Files
Digital organization is a big enough topic that it deserves its own book. But since we’re talking about decluttering your office, it’s important to briefly cover how to systematize your digital files.
Your digital life is a reflection of your physical life. If you have disorganized chaos in one, odds are you have the same problem with the other. Once your physical area is organized, spend time creating an organizational hierarchy for your digital content.
#1. Create a central location for all your files. You should be able to update and access important files at work, at home or even from your mobile device.
For instance you can keep all your files on Dropbox. You could use this or a few other options to store and back up your digital items:
Some other options:
We live an age where hacking can happen to any of us, so be sure to back up your files on a daily basis. You can use a company like Carbonite to do this automatically.
#2. Set limits on digital time wasters. Social media and funny cat videos can be entertaining, but they eat into your productivity, which leaves you less time to actually enjoy your life. Our advice is to use a tool like Rescue Time to monitor how you spend time on your computer during the workday.
#3. Organize files by content, not file type. By default, most systems will place files in folders based on file type, such as pictures in “My Pictures” or documents in “My Documents.” This is fine at first, but it can quickly get out of control when you have too many files.
A simple solution is to organize folders (and sub-folders) by the different aspects of your business. That way, you won’t jump from folder to folder looking for certain items. When you take the time to create a systematic filing system, you can immediately find the right documents – no matter how many items are on your computer.
#4. Use Evernote to capture ideas. Evernote is great for storing photos, thoughts, websites and quotes – whatever you need for the future should go into this tool. This is a free tool that’s perfect for storing and organizing random thoughts in a system that makes everything easy to retrieve.
#5. Limit email. Like walking into a dirty room, seeing a crowded inbox can be a stressful experience. Our advice is to keep your inbox as organized as possible on a daily basis. You don’t have to get to “inbox zero” every day, but it’s important to put a process in place for organizing the influx of email.
There is a lot more you can do to declutter your digital life, but if you complete these five tasks on a daily basis, you’ll set the framework for a solid digital filing system.
8) General Office Organization
We’d like to give a few final tips for decluttering and organizing your office.
General Office Tips:
- Hang hooks or have a coat rack by door. This will keep jackets, purses and umbrellas from cluttering your space.
- Give your desk a left-to-right workflow. Paperwork should come in on the left of your desk; process folders and work files should be in the middle; and storage files should be on the right.
- Business cards no longer need to be stored in a Rolodex. You can scan business cards in to Evernote and tag them as business cards, making a searchable index of business cards you can find from any platform.
There are other methods you can use. There are quite a few smartphone apps designed JUST to be instant Rolodexes. It’s easy to find one with a quick search online: CamCard Free, ScanBizCards Lite… - Organize your desk and drawers in order of importance. Frequently used items should go in the closest drawers with other items stored farther away.
- Limit how many items you keep in your office. Keep one bookshelf or one cabinet, not several of each. If they fill up, get rid of items you don’t use or digitize any unnecessary paperwork.
- Buy bright and colorful artwork for your walls (or get artwork from your kids or grandkids if you have them). This will brighten up your office and make for a more pleasant working environment.
- Every item in your office should have a “home,” a desk space, drawer, cabinet or bookshelf where it goes when your office is in its perfectly organized condition.
- Mark all appointments on your calendar of choice. Don’t leave a bunch of Post-it notes scattered around because this will only create more clutter. Use a digital calendar app like QuickCal or Google Calendar to keep track of every scheduled appointment.
- Get a small plant, flowers or a fern for your office, something to “green” up the place and make it a homier and less antiseptic environment. Remember, you will spend up to a third of your time here, so make it nice.
It doesn’t matter how bad your own clutter is — you can conquer the clutter of your entire living space or office immediately. It is not as difficult as it seems. And you will feel so much better the more ORDER you have in your life.. Take care of that clutter once and for all..
DECLUTTER FAST E-BOOK
“Get Organised! Clear The Clutter And Get On With Your Day”
Knowledge, careful planning, organised systems and dedication can give any organisation the basics it needs to be strong.
“5 Things You Can Do to Help Your Employee Clear Their Clutter”
Employees spend one hour/day looking for lost or misplaced files. For someone earning $50,000/year, that’s an annual loss of $6,250.